If you are going outdoors with an overnight stay, you will need a sleeping bag. You can sew it yourself with your own hands, all the more it is not as difficult as it seems at first glance.
DIY sleeping bag: materials
In order to sew a warm sleeping bag on your own, you will need to have the following materials at hand:
- waterproof raincoat fabric for the outer decoration of the sleeping bag and cotton body-pleasing for the interior decoration. Also for interior decoration materials such as poplin, calico and satin are suitable;
- synthetic winterizer or holofiber;
- lightning (1 or 2 pcs. depending on the model);
- related equipment (scissors, tape, needles or pins, sewing machine).
Gum or additional filler may also come in handy depending on the model.
Do-it-yourself sleeping bag model options
According to the principle of work, sleeping bags can radically differ from each other. There are tight bags with a tightened elastic band around the face, and there are free ones. There are even models for the most fastidious, having slots in the most unexpected places for the legs and arms.
Sleeping bag envelope

It is not at all difficult to cut and sew such a bag. For work, you will need two types of fabric (external waterproof and internal cotton) and a zipper from 100 cm long. And if you want to make additional holes for the convenience of your arms and legs, then get additional zippers in the amount that you plan to open.
Cut two identical pieces in the shape of a rectangle from different fabrics. Size 190-250 cm in height and 160-180 cm in width. Cut two or three pieces of padding polyester with the same rectangles of the same size, depending on how warm you want to make the sleeping bag.
Fold the cut parts in layers in the following order: filler layers, and on top layers of fabric folded with the front part to each other. Sew the layers around the perimeter, departing from the edge of at least one centimeter. Leave a small area unfinished in order to turn the part through it. Having turned out sew it manually by a secret seam.
You have a large rectangle. It must be quilted. Do this in the form of transverse lines passing at the same distance from each other.
Fold the product in half vertically with the front fabric inward. Stitch the edges to each other, with one seam that starts and goes along the bottom edge and rises sideways to the head. Do not forget to add and sew a zipper from the middle of the seam.
Turn the bag on the front side. You have an envelope folded in half with a zipper integrated from one edge.
For lovers of a more comfortable sleep, you can complicate this model by making holes in it for arms and legs.

To do this, it is necessary to make cuts along quilted lines in an already finished bag in the upper canvas. Insert a zipper between the layers and, wrapping the cut edges inward, stitch the seam on the machine. Thus, if desired, you can unzip and stick your leg or arm out of the bag. Make as many holes as you want. Do-it-yourself sleeping bag is ready. In this model it will be more comfortable to sleep if you take a small pillow for your head with you.
It is also fashionable to make an additional removable part for the head for this model, which will be fastened and unfastened with the help of a zipper. It is sewn on the same principle as a whole bag, namely, folded in layers, turned out, and then zipper is sewn to it for fastening with a sleeping bag. This is how this detail looks.

If you put more layers of filler in it than in the bag itself, then it will serve as a full-fledged pillow and you don’t have to take anything else with you.
Also, the model can be upgraded by making a transformer bag and a 2 in 1 blanket out of it. For this, sew along the edge of the zipper not to the middle of the bag, but along the entire seam with a bend to the seam in the legs. In this case, if you unzip all the zippers, you can get a full blanket.
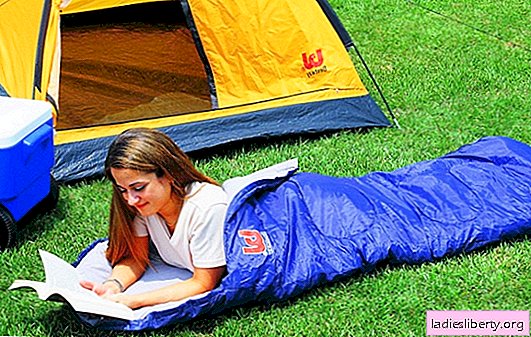
Cocoon model
This version of the sleeping bag differs from the previous one in that its width narrows to the legs, and the opening for the head is equipped with a stretching elastic band with clamps.

In order to sew such a sleeping bag, you will need the following materials: two types of fabric (the outer fabric is denser and the inner one is thinner), elastic, two clips and a zipper. Regarding lightning, here the longer it is, the better.
In order to start sewing such a bag, you need to make patterns of fabric. One detail for each type of fabric.
To do this, take a rectangle-shaped fabric where the length will be 230-260 cm and the width 120-150 cm. Fold the rectangle in half lengthwise. Cut the part from the folded fabric as shown in the picture below, where the left part of the pattern will pass along the bent edge of the fabric. In the same way, make two parts from synthetic winterizer.

If you want to make the bag warmer, you can lay not two, but three or four layers of filler, depending on what weather conditions you plan to stay.
Fold the fabrics together on a flat surface in layers. On the bottom layer, put two layers of padding polyester, on top two layers of fabric folded facing each other. Sew around the perimeter, backing 1 cm from the edge. While stretching the face area, lay a lace or elastic band so that its ends are nested between the fabrics, and the middle lies along the trimmed rounded edge of the part.
Do not overstrain the holes through which the cord will come out of the fabric, otherwise it will be impossible to adjust. Leave a 20 cm stretch at the feet. Not stitched; turn the product out through it. After that, sew this piece manually in a secret way.
You have a deployed bag with the ends of the laces sticking out from the sides (or with an elastic band). Immediately attach the clamps to the ends, because they can be tightened inside the bag and then you will have to try to take them out.
Fold the bag in half inside out, stitch the zipper in the direction from the shoulders to the legs. Lightning can reach the middle of the bag, or maybe to the very bottom. If the lightning ended in the middle, then in the remaining segment sew the edges together.
Now, in order to sew a seam in the legs, fold the bag in such a way that it should only be inside out. Sew the bottom edges together. The seam will be perpendicular to the previous one.
Turn the bag on the front side. Do-it-yourself cocoon-shaped sleeping bag is ready.
DIY sleeping bag: professional advice
• When buying a raincoat, choose a thick, waterproof fabric. Do not save, otherwise the result may upset, and the work will go down the drain.
• The filling layer at the bottom of the bag, which will be located on the ground below your back, must be thicker than at the top of the bag. It is important that lying on cold ground inside the bag was warm and comfortable. If suddenly, while lying in a bag, you feel cold from the ground, then this means that it is not suitable for sleeping in nature.
• Do not spare materials and money when making a sleeping bag.